CyberGate RAT Setup TUTORIAL
CyberGate Features:- Reverse connection Remote Administration Tool.
- BaseCode64, Xor, RC4 and AES traffic encryption (depends on features, etc …
- Language support
- View options
- Multi port support
- Remote connection search option
- Injection option to create new servers
- Anti debugging options to create new server
- Startup methods option to create new server
- Password protection method to create new server
- Optional binder option to create new server
- Icon changer option to create new server
- Delayed execution option to create new server
- Customizable installation folder and file name to create new server
- Ftp logs support
- Automatic DNS updater
- Multi profiles builder
- UAC (Vista and Seven protection) bypass on server
- Keylogger option
- Password recovery tool (browser, msn, windows …)
- Very light stub (~280kb)
- Chat feature
- File manager
- Registry editor
- Services manager
- Windows manager
- Processes manager
- Clipboard manager
- Socks 4/5 Proxy
- Http Proxy
- Mass features
- Installed programs manager
- Remote desktop (with capture)
- Remote webcam view (with capture)
- Capture audio
- Remote download and execute
- DOS prompt
- Send message boxes
- Control desktop items (taskbar, icon, start menu)
- Active ports list
- Server control (update, disconnect, restart)
- Remote open HTTP URL
- Send file and execute
- CD Open and Close
- Reverse Mouse Option
- Remote Power Options (Shutdown, Restart, etc …)
- Remote Mouse Lock
- Remote Keyboard Lock
- Remote Icons Hide/show
- Remote Start Hide/show
- Group support (connections can be organized in groups)
- Several function that can be performed from group panel
- URL visiter (with hidden feature)
- VBscript console
- Multi-user keylogger/file search
- Local file erases tool (erase files beyond recovery)
- Local startup manager tool
- Startup manager
- Programs assist
- Connection log incorporated in the client GUI
- CyberGate has task managers for client and server on connecting
- Task logs
- Add Notes for your connections if you want
- Multiple tabs in the client making your life easier (connections tab, group panel tab, client tasks tab, etc …)
- Automatically map ports if your router supports uPnP
- GeoIP server tracking for accurate remote computer localization tracking
- Easy search function on password recovery tool
- Thumbnails view on file manager allowing display all images of a remote folder
- Lock station
- Webloader (a webdownloader with 3.5 Kb)
- Windows OS bit system (x32/x64)
- Recoded webcam capture
- Recoded password recovery
- Run remote files as admin
Setup Instructions :
Open Up Cybergate..
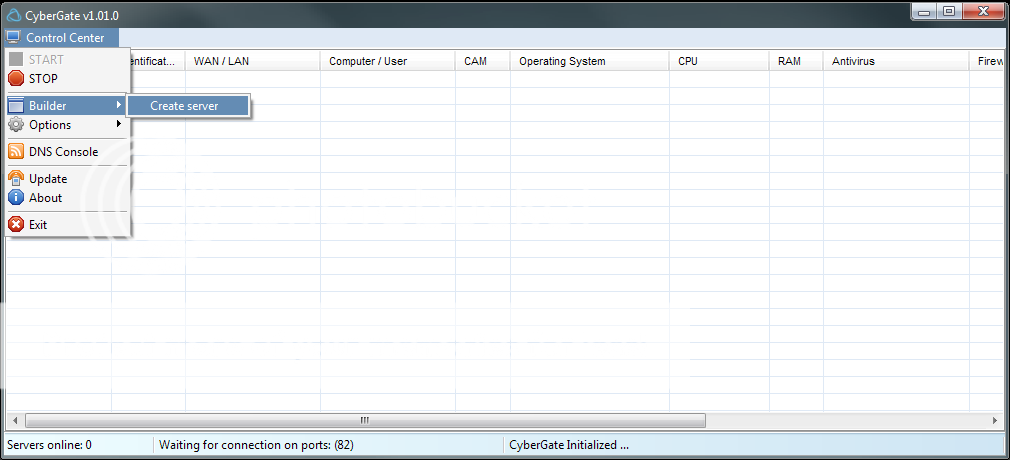
Now click Control Center - Start
Click Control Center - Options - Select Listening Ports And Do Following:
Good, You Are Done With The Settings! Now, let's move on to the Virus Creation :).
Click Control Center - Builder - Create Server. Make a new User named Hacking. Press Ok.
Mark the user "Hacker" And press Forward.
Now you should have something like this;
Press 127.0.0.1 | Port 999 and press Delete..:
After that, Click Add.
Now, A Box should pop up saying: 127.0.0.1:81. Like this:
Instead of 127.0.0.1:81 change that to (your local ip)192.168.1.5:81
Now Change the
Identification: remote
Password: cybergate
To This:
Identification: CyberGate
Password: Computermaniac
Good! You are now done with that :). Let's move on to "Installation"
Use the Exact same settings as i do. :
Good, We Skip Message. We Skip Keylogger. In the Anti Debug Have everything checked
In The Build Server: Use Google Chrome Passes and UPX.. (Makes the server smaller)
And press Create Server. Good, You do now have your RAT server complete!
If your RAT doesent work. check following things:
Non-Connecting RATs
You have properly port-forwarded if using a router.
The password in Listening Ports and the password your server uses are identical.
You are Listening on the correct ports.
Your Firewall is letting connections through on the port you're listening on.
Your server is added to excluded files in your Antivirus and Firewall.
Your server injects explorer.exe instead of the default browser.
How to port forward..
Go to Portforward.com and lookup your Router, there shall be a guide on how to port forward on it :). and if you are on a modem.. then you don't need to port forward.
Enter Start - Run . Command. Type Ipconfig
The ip which is in the "Standard Gateway", That is your Router IP.
Type that into your web browser. Log in, And Port forward port: 81.Download Here.PassRar:computermaniac


No comments:
Post a Comment